
A facility manager usually sees the same pattern before anyone says “air leakage.” Utility bills creep up. Occupants near perimeter offices complain first. Maintenance teams adjust thermostats, then get calls from another wing because the space has become too warm. The issue gets framed as HVAC performance, but the building is often losing conditioned air at the window line.
That’s where window weather sealing stops being a small maintenance task and becomes an operating-cost decision. In multifamily portfolios, offices, schools, and municipal buildings, a weak seal around dozens or hundreds of windows adds recurring load to equipment that already runs hard. The right fix isn’t just “put foam on it.” It’s inspecting the assembly correctly, choosing materials that match the window type and climate, installing them without shortening their service life, and verifying that the work changed building performance.
Beyond the Draft The Business Case for Air Sealing
A campus budget review often starts with energy variance, overtime calls, and comfort complaints from perimeter spaces. Window weather sealing usually enters the conversation later, even though leakage at the window line can drive all three.
In commercial buildings, air leakage around windows is rarely an isolated nuisance. It adds load to heating and cooling equipment, pushes staff toward repeated thermostat changes, and creates a steady stream of occupant complaints that maintenance teams end up treating as separate problems. On a single elevation, the effect can look minor. Across a school district, office portfolio, or multifamily program, it becomes a recurring operating expense.
The business case is straightforward. Sealing windows costs less than replacing equipment early, chasing comfort calls all season, or paying to condition air that never stays inside. Good weather sealing also protects other investments. Controls work better when perimeter losses are reduced. Preventive maintenance schedules hold up better when units are not running extra hours to offset avoidable leakage.
Why facility teams should treat windows as a system
Window weather sealing affects comfort, runtime, and service life at the same time. That matters in buildings where one weak façade can distort how staff read the whole HVAC system.
Three patterns show up often in portfolio work:
- Complaint patterns follow exposure: Windward elevations, upper floors, and older operable units usually produce the highest call volume.
- Air leakage gets misread as a controls problem: Staff compensate with setpoint changes, then another zone drifts out of range.
- Small failures scale badly: A worn meeting rail seal or failed corner gasket is easy to ignore on one unit and expensive to ignore across hundreds.
The test is whether the seal still performs after seasonal movement, repeated operation, and routine custodial wear. In commercial work, durability matters more than the lowest first cost.
For property teams that need a plain-language refresher on glazing, spacer failure, and related seal issues, what a window seal is and why it matters for your home is useful background. It’s consumer-oriented, but the distinction still applies in larger buildings. A failed insulated glass seal and failed perimeter weatherstripping are different defects, and they belong in different scopes of work.
The scale argument
The economics improve quickly when sealing moves from one-off repair to program work.
A single callback can wipe out the savings from using a cheaper material or skipping verification. On larger properties, the better approach is to standardize inspection criteria, group similar window types, and seal in batches that crews can repeat consistently. That reduces mobilization waste and makes post-work quality checks easier to compare from building to building.
This is also why field confirmation matters. A visible gap does not always explain the full leak path, and some of the worst offenders are not obvious until the assembly is tested under pressure or traced with air movement tools. Teams that want cleaner diagnostics before writing a large scope can use methods like smoke puffer testing for window and envelope air leaks to separate cosmetic issues from leakage that is driving cost and complaints.
For facility managers and program coordinators, window weather sealing is not a cosmetic upgrade. It is a durability and ROI decision. Done well, it lowers complaint volume, supports HVAC performance, and gives capital planning teams a practical alternative to replacing windows that still have useful service life.
The Professional Air Leak Inspection Process
A property team usually calls for window sealing after the same pattern shows up across multiple spaces. Perimeter offices run cold in winter. Occupants add tape or towels at the sill. Maintenance adjusts hardware, but complaints return on the next windy day. At that point, the job is no longer “seal the draft.” The job is to identify which leak paths are worth fixing, which openings need repair first, and which defects belong in a larger envelope scope.
Good inspection work produces a scope that crews can repeat across dozens or hundreds of openings.
Start with a repeatable field walk
Begin with a documented survey, not a caulk gun. On occupied commercial properties, I prefer to work by elevation first, then by room or suite, because exposure often explains more than occupant feedback alone. Every window should get an ID tied to floor, room, facade, and opening number. Without that, post-work verification turns into guesswork.
Record the basics every time:
- Window type and operation: Double-hung, slider, casement, awning, fixed, or mixed assembly.
- Frame and substrate condition: Metal, vinyl, wood, or composite frame, plus the condition of adjacent wall materials.
- Exposure: Windward facade, shaded elevation, upper-floor stack effect zones, and areas with known water exposure.
- Existing sealing condition: Missing weatherstrip, hardened sealant, compressed pile, loose corners, or signs of prior patch repairs.
- Operating condition: Hardware pull-in, latch engagement, sash alignment, and whether the unit closes square.
The goal is to separate leakage caused by worn weatherstripping from leakage caused by movement, poor closure, or failed frame-to-wall joints. Those are different repairs with different labor and material costs.
If a building is under acquisition review, this belongs in the same risk screen as roof condition and deferred mechanical work. Hidden leakage around windows can turn into comfort complaints, higher runtime, and repeated service calls after closing. That is one reason broader due diligence guidance on getting a contractor to assess a property’s potential matters for owners and asset managers, not just for renovation planning.
Use air-movement tools under controlled conditions
A visual walk tells you where to look harder. It does not tell you the full leak path.
Smoke remains one of the most practical field tools because it shows direction and intensity quickly, especially around meeting rails, latch sides, frame corners, and interior trim lines. On larger properties, crews get better results when they test under the most revealing conditions available, during windy weather, with the HVAC creating pressure differences, or during scheduled depressurization testing. A smoke trail that pulls inward at the sash may point to worn weatherstripping. Smoke disappearing at the interior casing can indicate a frame-to-wall problem instead.
For teams building a standard inspection routine, using a smoke puffer to identify air leaks gives crews a practical method for checking openings consistently without full diagnostic setup at every window.
Add infrared when conditions support it. Use pressure testing when the building and budget justify it. In my experience, smoke is often the fastest way to sort windows into action categories before bringing in more intensive diagnostics.
Useful inspection notes identify the leak location, the operating condition, and the probable failure point. “Draft at window” is not enough for a commercial work order.
Document symptoms that change the repair scope
Several field signs should push the scope beyond simple weatherstrip replacement.
Look closely for racked frames, sash sag, worn balances, failed latches, loose anchors, and cracked perimeter sealant. These conditions matter because new sealing material cannot compensate for a unit that does not close evenly or a frame that has shifted out of plane. Dirt tracks and localized staining also help. Air often carries dust through the actual leak path, so those marks can be more useful than a general complaint from the room occupant.
Moisture evidence needs special care. If condensation, staining, or corrosion is present, verify whether the issue is air leakage, water entry, or both. Program teams lose money when they write a weatherstripping scope for an opening that instead needs frame repair or exterior joint remediation.
Convert findings into crew-ready work orders
Inspection has value only if installers can use it in the field. The cleanest scopes are specific enough for production crews and simple enough for quality control staff to verify after the fact.
A workable commercial format usually includes:
-
Window ID and exact location
Floor, room, elevation, and opening number. -
Assembly type
Double-hung, casement, awning, fixed, storefront vent, or other operating configuration. -
Leak path
Meeting rail, jamb, sill, latch side, operator side, perimeter frame joint, or adjacent penetration. -
Observed cause
Missing weatherstrip, compression set, poor hardware pull-in, frame movement, failed sealant, or unknown pending further testing. -
Prescribed action
Replace weatherstrip, adjust hardware, renew sealant, repair sash alignment, or escalate to carpentry or envelope repair. -
Priority
Immediate comfort issue, scheduled production work, or monitor until broader capital repairs.
That level of documentation reduces callbacks. It also helps procurement teams standardize materials and lets program coordinators compare performance across properties with similar window inventories.
Prioritize openings by cost and consequence
The first windows sealed should be the windows that create the biggest operating problem. Ease of access matters, but it should not drive the whole schedule.
A practical order is straightforward:
- Wind-exposed facades: These openings usually produce the highest air leakage under real weather conditions.
- Critical occupancy zones: Classrooms, patient areas, conference rooms, tenant-facing offices, and corner spaces generate the most complaints and the most visible comfort improvement.
- Repeat-maintenance locations: Windows that have already had hardware adjustments or occupant-applied fixes often indicate a defect pattern worth addressing in batches.
- Matched window groups: Once the failure mode is confirmed, scale the repair detail across the same series, size, and exposure.
This is how sealing programs stay economical. Diagnose carefully at the front end, write scopes that match the defect, and concentrate labor where the building gets measurable performance gains first.
Choosing Durable Weather Sealing Materials
A window sealing program can lose its return in a year if the material spec is wrong. On a commercial property, early failure does not just mean a draft returns. It means repeat labor, tenant complaints, access coordination, and another round of purchasing for the same opening.
Material selection should reflect service conditions, not shelf price. Crews need to account for cycling frequency, frame condition, exposure, cleaning practices, and how tightly the sash or vent closes against the seal. A product that works on a lightly used office window may fail quickly on a school facade or in a multifamily corridor where windows are opened, slammed shut, and cleaned often.
What usually holds up best in field conditions
For many retrofit programs, V-strip, also called tension-seal weatherstripping, is the better long-term choice for moving sash interfaces. House Digest’s comparison of common weatherstripping materials notes that foam is easy to apply, but V-strip generally lasts longer and maintains sealing pressure better when installed correctly.
That matches field practice. Adhesive-backed foam is useful for short-cycle work, temporary stabilization, and low-budget corrections where access time is limited. In a portfolio program, though, I would rather specify a formed seal that keeps pressure over time than depend on adhesive alone in a dusty channel or on an uneven painted surface.
Weather Sealing Material Comparison for Commercial Use
| Material Type | Best For | Durability | Est. Cost/ft | Professional Tip |
|---|---|---|---|---|
| V-strip or tension seal | Double-hung windows, sliding interfaces, long-term retrofit work | Generally better than foam in repeated-use applications | Varies by product and project scale | Use where the channel can accept a formed seal without wrinkling or binding. |
| Pressure-sensitive foam tape | Fast deployments, temporary corrections, simple stop surfaces | Shorter service life in high-cycle or exposed conditions | Lower upfront cost | Only use on clean, dry surfaces and avoid over-compression. |
| Tubular vinyl or bulb rubber | Casement and awning windows with compression closure | Can perform well where hardware consistently pulls the sash tight | Varies by specification | Best for compression-style closures, not loose or misaligned assemblies. |
| Pile weatherstrip with Mylar fins | Humid or coastal applications, some sliding assemblies | Often a better fit than standard foam in damp service conditions | Varies by specification | Inspect regularly in wet climates and confirm the product is rated for that exposure. |
For procurement teams, conservative assumptions are safer than optimistic service-life claims. Manufacturer literature rarely reflects dirty substrates, bent frames, weak latches, or tenant use. If the material needs near-perfect conditions to last, it is a poor choice for a large rollout.
Climate and substrate drive performance
Climate matters, but substrate condition usually decides whether a seal lasts. Old paint, oxidation on aluminum, warped wood, and vinyl movement under heat all change how a product behaves after installation.
A few patterns show up repeatedly in commercial work:
- Aluminum windows: Allow for thermal movement and avoid materials that lose shape or adhesion after repeated expansion and contraction.
- Wood windows: Expect variation. The seal needs enough forgiveness to handle minor waviness, paint buildup, and seasonal movement.
- Vinyl frames: Do not force stiff products into narrow profiles. That often creates latch problems and service calls.
- High-humidity or coastal properties: Favor products designed for damp exposure and inspect them more often than inland installations.
Cheap adhesive-backed foam often looks acceptable on turnover day. The true test is whether it still seals after a season of opening, closing, cleaning, and weather exposure.
Sealants and adjacent air barriers
Weatherstripping handles operable joints. It does not solve every leakage path around the window assembly. Frame perimeters, trim joints, and cracks at adjacent materials often need sealant, backer rod, or repair work before the opening performs as intended.
Silicone is commonly used where movement and moisture resistance matter, but it is not a cure for poor alignment or missing compression. Low-expansion foam also has a place around rough openings and surrounding cavities when crews control depth and expansion correctly. For a practical overview of where that approach fits, see 5 things to know about spray foam insulation.
If you’re sourcing standard retrofit items across many openings, Conservation Mart, LLC offers weatherstripping, foam weather seal products, and shrink-and-seal window insulation kits through its catalog. For program managers, the value is consistency in stocked parts and fewer substitutions in the field. That only helps if the material schedule is matched to the actual window type and exposure.
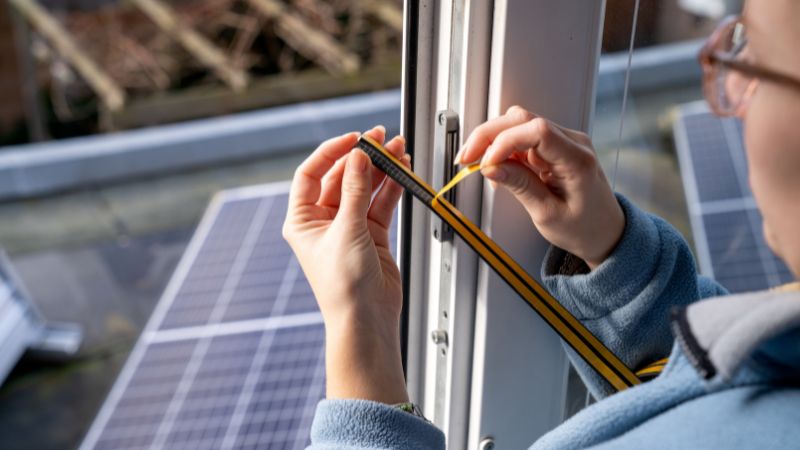
Professional Installation for Common Window Types
A 200-window sealing job can miss its savings target for a simple reason. The crew installs decent material on openings that never close square, cuts corners loosely to keep pace, and leaves with windows that feel tighter for a week and start leaking again by the next service cycle.
On commercial projects, installation quality drives the result more than the package label. Crews usually lose performance at three points: poor prep, loose measurement, and weak corner treatment. The method has to match the window type, the closure pattern, and the abuse that opening will see in daily use.
Double-hung windows
Double-hung units show up across multifamily portfolios, schools, municipal buildings, and older office stock. Their repeat leak locations are familiar: jamb tracks, meeting rails, and the contact points between sash and frame. They also create a common production problem. A crew can install material that looks neat and still interfere with balance operation or latch engagement.
For large retrofit programs, the goal is not just to reduce air leakage on day one. The goal is to keep the sash operable after hundreds of cycles and routine cleaning. That usually means using spring-type weatherstripping where the geometry supports it, and limiting soft foam products to locations where compression stays controlled.
Field sequence for double-hung units
-
Confirm where the air is moving
Test the jambs, sill, and meeting rail before cutting material. Crews work faster when they know which interfaces are leaking and which ones have a hardware problem instead. -
Prep the substrate properly
Dirt, oxidized paint, and residue shorten adhesive life. Surfaces should be clean, dry, and sound before any strip goes in. -
Cut for contact, not tension
Material installed under tension pulls back at the ends. Leave enough length for full contact at the termination points and corners. -
Match the profile to the channel
Spring bronze or V-strip works where it can flex and recover. Foam belongs only where the sash can compress it consistently without dragging. -
Cycle the window before the installer leaves
Open, close, and cycle the unit’s lock several times. If the sash binds or the latch no longer seats cleanly, the detail needs correction on the spot.
A common mistake on portfolio work is treating every double-hung opening as interchangeable. They are not. Older wood units with paint buildup, replacement vinyl inserts, and aluminum-framed windows each respond differently to the same product. Standardization matters for purchasing, but field supervisors still need an approved material schedule that accounts for frame type and condition.
Failure points that drive callbacks
- Wrinkled or twisted material in the jamb
- Foam that is too thick for the available closure pressure
- Gaps at the meeting rail ends
- Adhesive products applied over dust, moisture, or failing paint
- Weatherstripping used to compensate for sash misalignment
If a double-hung window becomes harder to operate after sealing, the work is not finished. In occupied buildings, forced operation tears material, frustrates tenants, and turns a low-cost energy measure into a maintenance problem.
Casement and awning windows
Casement and awning windows depend on even compression around the perimeter. They can perform well when the sash closes square and the hardware pulls the unit tight against a continuous gasket. They perform poorly when the frame is racked, the operator is worn, or the installer stretches the seal around corners.
These units reward careful prep and punish rushed work. Compression seals need the right profile, the right closure force, and corners that stay in contact after repeated opening cycles. If the hardware cannot bring the sash home evenly, changing the gasket alone will not hold.
Installation priorities for casement and awning assemblies
-
Inspect first
Uneven gaps usually point to hinge wear, frame movement, or hardware adjustment issues. Seal replacement should follow those corrections, not substitute for them. -
Clean stop surfaces thoroughly
Compression seals rely on uniform contact. Debris or old adhesive lumps change the profile and create bypass paths. -
Choose a profile that matches closure force
Tubular and bulb-style seals work well where the sash compresses them evenly. Oversized profiles often create latch complaints and early deformation. -
Form corners carefully
Butt joints and miters both work if the contact stays continuous. Small skips at corners become repeat leak locations on wind-exposed facades. -
Check operation under normal use
Close, latch, reopen, and relatch the sash several times. Watch for rolling, bunching, or displacement near hinges and lock points.
A short visual refresher can help crews align technique before rollout:
Program managers should also separate perimeter gasket replacement from hardware scope in the work order. That sounds administrative, but it affects ROI. If the budget covers seal material and labor but not hinge, operator, or latch correction, the crew may leave behind a window that still leaks and still generates comfort complaints.
Fixed and picture windows
Fixed windows call for a different scope. There is no operable joint to weatherstrip, so the leakage path is usually at perimeter sealant joints, glazing interfaces, trim connections, or frame-to-wall transitions. On these openings, the work is less about adding a strip and more about restoring joint continuity.
That requires restraint. Recaulking the visible perimeter can make the opening look repaired while leaving the actual leak path untouched. If air is entering through failed adjacent sealant, missing backer support, cracked glazing components, or a problem in the surrounding wall assembly, surface caulk alone will not solve it.
Practical rule for fixed assemblies
- Use weatherstripping on moving interfaces
- Use sealant on fixed joints
- Escalate to enclosure repair when leakage is at the frame-to-wall assembly
That distinction matters on large properties. It keeps window weather sealing crews focused on measures with predictable service life and keeps broader facade defects from being misclassified as simple maintenance work.
Verifying Seal Performance and Long-Term Maintenance
A 200-window property can finish a sealing project on Friday and still get comfort complaints on Monday. The usual problem is not the idea of weather sealing. It is the lack of proof. If crews do not verify pressure, contact, and operation after installation, missed leak paths stay in service until the next heating or cooling spike exposes them.
Post-install verification protects the budget as much as the building. Facility managers need to know whether the work reduced infiltration at the targeted openings, whether the sash still operates correctly, and whether the result is likely to hold through the next maintenance cycle.
Verify performance with field methods that scale
Start with the opening itself. Operate the window through a full cycle, confirm latch engagement, and check for even contact along the seal line. Then repeat smoke testing at the exact locations flagged during inspection. If smoke still tracks through the same corner or meeting rail, the failure is usually easy to classify. Wrong profile, poor adhesion, incomplete continuity, or hardware that never brought the sash tight to begin with.
On larger properties, sample-based testing is usually the practical choice. Test a representative group by window type, elevation, and exposure instead of trying to instrument every opening. That gives program coordinators enough evidence to accept the work, reject a bad detail, or adjust the specification before the crew repeats the same mistake across the rest of the site.
Blower door testing and infrared imaging also have a place, especially in buildings with recurring complaints or mixed leak paths. Blower doors help quantify whether leakage dropped at the unit or building level. Thermal imaging helps separate a window seal problem from a frame-to-wall or facade problem, which matters if the weather sealing scope is part of a broader green retrofit planning effort for existing buildings.
Verification should answer two operational questions. Did airflow at the target location drop, and did the window remain fully functional after the repair?
Set maintenance intervals by exposure, not by calendar alone
Window seals wear at different rates on the same property. South and west elevations usually see more UV stress. Coastal buildings deal with salt and moisture. High-use openings in schools, healthcare buildings, and multifamily common areas fail differently than rarely opened administrative windows.
That is why annual review is a baseline, not a fixed rule.
A useful maintenance check includes:
- Adhesion and edge condition: Look for lift, shrinkage, tearing, brittle surfaces, and end pullback.
- Compression recovery: Check whether the gasket still rebounds or stays flattened after the sash opens.
- Operating pressure and alignment: Confirm that latches, hinges, operators, and keepers still pull the sash into full contact.
- Signs of bypass: Dirt streaks, staining, and localized condensation often mark the actual leakage path.
For occupied portfolios, fold these checks into seasonal preventive maintenance rounds. Staff do not need to re-test the whole envelope every time. They do need a clear threshold for action. A single damaged seal may call for local replacement. Repeated failure on one elevation or one window series usually means the spec, the hardware adjustment standard, or the installation method needs to change.
Match maintenance expectations to material and climate
Service life changes fast once heat, moisture, and UV are working together. Standard foam tapes can deteriorate quickly in wet or high-exposure conditions, even when they perform acceptably in mild inland locations. In those buildings, teams should expect shorter inspection intervals and should favor materials with better resistance to compression set, moisture, and abrasion.
Climate-specific guidance matters here, but the field lesson is straightforward. Product standards should vary by region and exposure. A material that is adequate for a sheltered office facade may become a repeat work order on a coastal elevation or a sun-exposed corridor window.
The same rule applies to maintenance planning. More durable pile systems, silicone-based profiles, and damp-rated products still need inspection. They tend to hold performance longer where basic foam products break down early.
Track failures like building assets
The strongest programs log seal type, install date, window type, elevation, and follow-up findings. That record turns complaints into usable maintenance data. If one gasket profile keeps failing on a specific operable window line, stop buying that profile. If one crew leaves recurring corner gaps, correct the installation standard before the next phase.
This is how large properties keep window weather sealing from turning into repeat patchwork. Verify the result. Track the failures. Adjust the spec before labor costs outrun the savings.

Calculating ROI and Implementing a Sealing Program
A facilities budget review usually starts the same way. The building team knows which elevations draw complaints, the maintenance staff knows which windows keep getting patched, and finance wants proof that another round of sealing work will last long enough to justify the spend.
That proof has to come from field conditions, not generic savings claims. For commercial properties, window weather sealing earns approval when the scope is tied to inspected failures, the material life is realistic for the exposure, and the labor plan fits the building’s access and occupancy constraints. In practice, the best candidates are the openings that drive HVAC runtime, trigger occupant complaints, or consume repeat maintenance hours.
A practical ROI framework
Build the estimate from four inputs:
| Input | What to include |
|---|---|
| Project scope | Number of windows, window types, and whether the work is selective or building-wide |
| Direct cost | Materials, labor, access equipment, tenant coordination, and verification time |
| Avoided cost | Reduced HVAC runtime, fewer comfort-related service calls, and less repeat patching |
| Non-energy value | Improved occupant comfort, fewer complaints, and support for sustainability reporting |
Use a range, not a single payback number. A ground-floor office with accessible punched windows is a different job from a mid-rise property with swing stages, tenant scheduling limits, and several operable window lines. If the estimate ignores access, verification, and callback risk, it is not an ROI model. It is a purchasing guess.
Separate quick corrective work from larger capital items. Replacing failed sealants and worn weather stripping on otherwise serviceable windows often pays back faster than frame repairs or full window replacement, and it creates a cleaner basis for prioritizing future envelope work.
Program design for scale
Portfolio programs perform better when they are phased. Start with a representative sample by window family, facade exposure, and occupancy type. Confirm which failures are material related, which are installation related, and which stem from window condition that sealing alone will not fix.
Then standardize the work.
- Set one approved detail per assembly: Crews should not choose methods in the field without a tested reason.
- Match materials to service conditions: High-cycle windows, wet exposures, and sun-loaded facades rarely age the same way.
- Define the inspection rate before rollout: Random checks after completion miss patterns that in-process verification can catch.
- Track labor and callback data by building and window type: That record improves the next round of procurement.
- Coordinate with broader retrofit planning: Teams integrating this work into green retrofitting strategies for existing buildings usually get better sequencing and less disruption.
Large programs succeed or fail on repeatability. If one detail works only when your best installer handles it, it is not ready for portfolio use.
The final measure is simple. Judge the program by reduction in complaints, reduced service calls, stable seal performance through seasonal operation, and whether the maintenance team can repeat the standard without constant correction.
If you’re planning a building-wide or portfolio-wide air sealing effort, Conservation Mart, LLC offers practical guidance for weatherization planning, field implementation, and conservation product selection. It is a useful starting point for facility teams, contractors, and program coordinators who need repeatable methods rather than one-off fixes.
FAQs
What problems does poor window weather sealing cause in commercial buildings?
Poor sealing allows conditioned air to escape, which increases HVAC runtime, raises energy costs, and creates uneven temperatures. It also leads to repeated comfort complaints and unnecessary maintenance calls.
Why is window weather sealing considered an ROI decision rather than simple maintenance?
Because ineffective sealing impacts operating costs over time. Properly sealing windows reduces energy waste, lowers service calls, and extends HVAC system life, making it a cost-saving investment rather than just a repair task.
How do facility teams identify which windows need sealing?
Teams typically start with a structured inspection, documenting window type, condition, and exposure. Tools like smoke testing help pinpoint actual air leak paths, separating minor issues from problems that drive energy loss and complaints.
What is the most common mistake in large-scale window sealing projects?
Treating all windows the same. Different window types, materials, and exposures require specific solutions. Using the wrong material or skipping proper inspection often leads to early failure and repeat labor.