
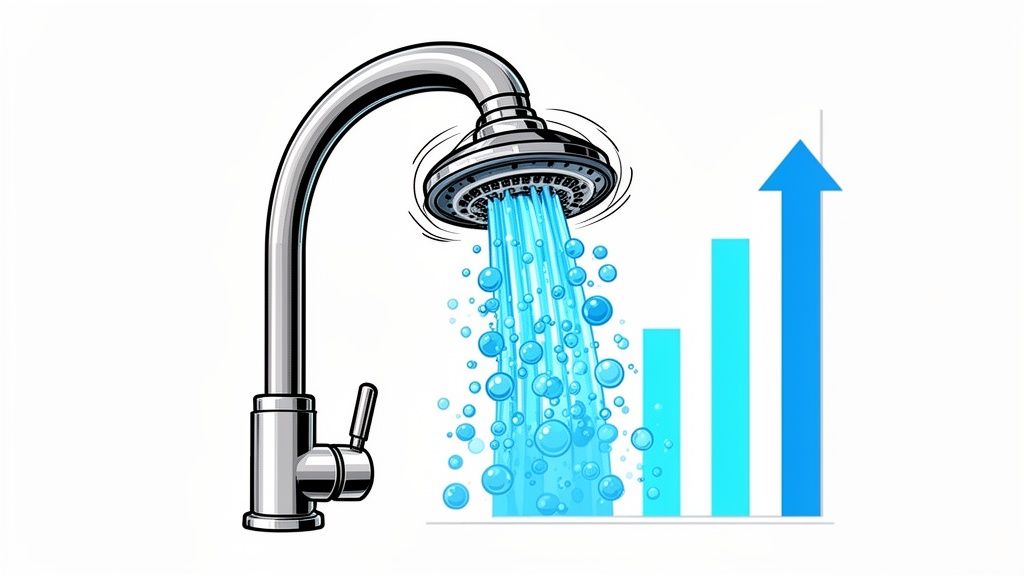
A kitchen tap aerator is a small, screw-in gadget that works a little magic right at the end of your faucet. By mixing air into the water, it creates a full, steady stream while actually using less water. For businesses, this tiny part is a secret weapon for slashing utility costs—it cuts down on water use and the energy it takes to heat that water.
The Strategic Value of Kitchen Tap Aerators
It’s easy to overlook, but that humble kitchen tap aerator is a powerhouse for any business trying to run a tighter ship. Don’t think of it as just a piece of plumbing; it’s a high-return, low-risk investment. For facility managers, property owners, and sustainability officers, these devices are a true strategic asset.
Think of it this way: retrofitting aerators is like upgrading your entire vehicle fleet for better fuel efficiency. A small, cheap change to each unit stacks up to massive, compounding savings across your whole operation. It’s a simple move that delivers a one-two punch to your utility bills, hitting two major operational expenses at once.
Dual Impact on Your Bottom Line
The financial upside goes way beyond just using a bit less water. A smart aerator program hits your budget in two critical ways:
- Reduced Water Consumption: By design, aerators limit the flow rate, which directly cuts the volume of water used every single time a tap is turned on. When you multiply that across all the kitchens in an apartment complex, hotel, or office building, the savings add up fast.
- Lower Energy Costs: This is the benefit people often forget, but it’s huge. Using less hot water means your water heaters don’t have to work as hard, which significantly trims your gas or electricity bills. In many commercial buildings, the energy savings can actually be equal to or even greater than the water savings.
A Scalable Efficiency Initiative
This isn’t just some minor maintenance task; it’s a full-blown efficiency initiative with a payback period often measured in months, not years. The widespread adoption of kitchen tap aerators has already made a measurable dent in global water conservation. Modern devices can reduce faucet flow rates by 30–50% compared to older, unrestricted taps. The global market for these parts is only expected to grow as more businesses realize their value in hitting both regulatory standards and their own financial targets.
When you reframe the aerator from a simple part to a performance upgrade, you can build a powerful business case for a project that delivers immediate and lasting financial returns. This small device truly punches above its weight.
For businesses running hotels, multi-family housing, or corporate offices, a systematic aerator retrofit program is one of the most cost-effective conservation measures out there. To get a better handle on the basic mechanics, you can learn more about what you need to know about faucet aerators. Next up, we’ll dive into the specific types of aerators and how to pick the right ones for your unique needs.
Matching Aerator Technology to Your Business Needs
Let’s be clear: not all kitchen tap aerators are the same. Picking the right one is a balancing act between saving the most on your utility bills and keeping performance high—a critical calculation for any commercial property.
At its core, an aerator is a beautifully simple device. It works like a fine-mesh filter, pulling air into the water and mixing it. The result? A stream that feels full and powerful, even though it’s using a whole lot less water.
But the type of stream it creates makes a huge difference, depending on where it’s installed. Get this part right, and you’ll boost efficiency without a single complaint about water pressure. A successful retrofit really comes down to matching the right tool to the right job.
This flowchart lays it out perfectly, showing how the simple decision to install an aerator directly pads your bottom line.
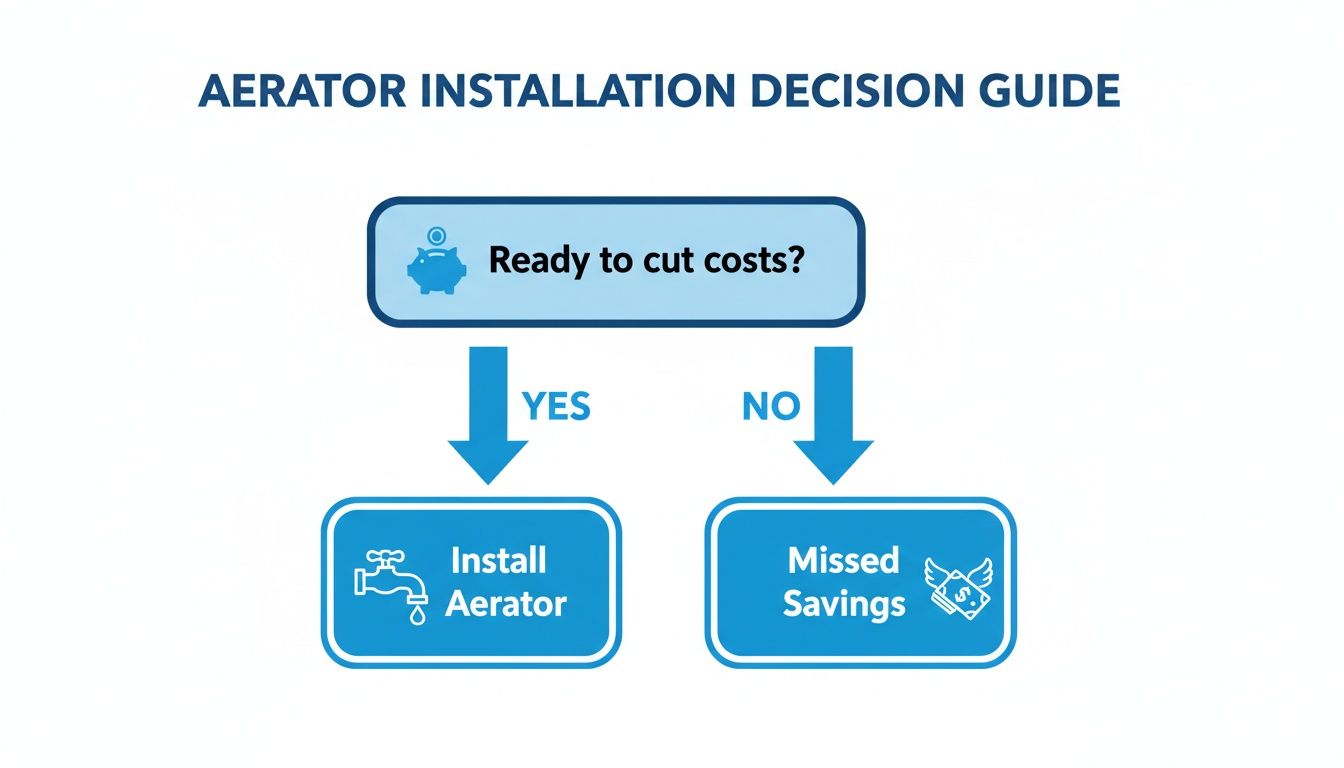
As you can see, skipping this small upgrade is a direct path to missed savings. That’s a loss that adds up every single day, across every faucet in your portfolio.
Understanding Different Stream Types
The most common stream types serve very different purposes, and picking the wrong one can cause some real operational headaches. For commercial jobs, three main types will cover just about every situation you’ll encounter.
To help facility managers and procurement teams choose the right product, we’ve put together a quick comparison of the most common aerator stream types and their best applications in commercial settings.
Commercial Kitchen Tap Aerator Types and Applications
| Aerator Type | Stream Appearance | Common Flow Rates (GPM) | Best Commercial Use Cases | Key Benefit |
|---|---|---|---|---|
| Aerated (Bubble) | Soft, white, splash-free | 0.5, 1.0, 1.5 | Office breakrooms, hotel bathrooms, apartment kitchens | Comfort and splash reduction |
| Laminar | Crystal-clear, non-aerated | 1.0, 1.5 | Healthcare facilities, clinics, food prep areas | Hygiene (prevents aerosolized bacteria) |
| Spray | Wide, shower-like pattern | 1.5, 1.8, 2.2 | Restaurant kitchens, cafeterias, utility sinks | High-power rinsing and cleaning |
This table should give you a solid starting point for matching the stream to the task.
- Aerated (Bubble) Stream: This is the one you see most often. It creates a soft, whitened, splash-free stream that’s perfect for general handwashing. Think office breakrooms, hotel rooms, and apartment kitchens where user comfort is key.
- Laminar Stream: This type produces a perfectly clear, non-aerated stream of water. Because it doesn’t mix in air, it’s the mandatory choice for healthcare facilities and food prep zones where preventing the spread of airborne bacteria is non-negotiable.
- Spray Stream: With a wide, forceful pattern like a mini-showerhead, spray aerators are built for serious rinsing. You’ll want these in high-demand commercial kitchens for pre-rinsing dishes or washing produce.
If you want to get deeper into the weeds on spray patterns, check out our article on the differences between bubble vs needle spray aerators. It’s a great resource for figuring out your high-volume rinsing needs.
Selecting the Optimal Flow Rate
After stream type, the flow rate—measured in gallons per minute (GPM)—is where the real savings happen. An older, standard kitchen faucet can easily gush out 2.2 GPM or more. Swapping in a low-flow aerator can slash that number dramatically.
Selecting the correct GPM is a strategic decision. The goal is to install the lowest possible flow rate that does not impede the primary function of the faucet in that specific location.
For instance, a 1.5 GPM aerator is a fantastic all-around choice for most commercial kitchens. It delivers big water savings without anyone noticing a drop in performance for daily tasks. But in a small office kitchenette where the tap is only used for handwashing, you could easily drop to 1.0 GPM or even 0.5 GPM for even bigger savings with zero downside.
On the flip side, a busy restaurant kitchen might need a bit more power to fill pots quickly. In that case, a 1.8 GPM aerator is a smart compromise between efficiency and speed. By thinking through the specific needs of each area, a facility manager can tailor the aerator selection for the perfect blend of savings and satisfaction across an entire property portfolio. This targeted approach is what makes a conservation program truly effective and sustainable.
Making Sure Everything Fits Across Your Properties
Any big retrofit project is only as good as the planning that goes into it. The single biggest reason these projects fail isn’t the technology—it’s discovering that the new parts don’t actually fit your existing faucets. There’s nothing worse than sending a maintenance team out to hundreds of units only to find out they have the wrong size aerators. It’s a costly mistake, and it’s completely avoidable.
Think of this section as your practical field guide. We’ll show you how to get it right from the start, so your procurement is accurate and the project runs smoothly.
To build a precise order, your staff needs to start with an audit of the faucets across your properties. The good news is that this process is straightforward and doesn’t require any specialized tools. All it takes is a clear understanding of what to look for: the thread type and the diameter of the faucet spout.
This simple visual is your team’s best friend out in the field. It makes identifying the most common sizes and thread patterns a breeze.
Identifying Faucet Thread Types
First things first: does the faucet need a male-threaded or a female-threaded aerator? The terms can sound a little technical, but the idea is simple. It all comes down to where the threads are located.
- Male Threads: If your faucet spout has threads on the outside, it needs a female-threaded aerator. Think of it like a jar lid—the new aerator screws onto the faucet.
- Female Threads: If the faucet has threads on the inside of the spout, it needs a male-threaded aerator. This one screws into the faucet, like a lightbulb.
This is a critical first step. Get the thread type wrong, and the aerator won’t connect, no matter what size it is. For large properties with faucets that were installed at different times, it’s pretty common to find a mix of both types. Careful notes for each unit or building are essential.
Measuring Faucet Diameter with the Coin Test
Once you know the thread type, the next step is figuring out the diameter. You can forget about calipers or tape measures. The fastest and most reliable method for your maintenance team is the simple coin test. This trick uses common coins to quickly identify the three standard industry sizes for kitchen tap aerators.
The coin test is a genius, tool-free way to size up a faucet spout. By simply seeing if a nickel or a dime fits inside the opening, your team can instantly tell which aerator size to order. It takes all the guesswork out of the process.
Here’s how to do it after removing the old aerator:
- Regular Size (The Nickel Test): If a U.S. nickel fits snugly into the faucet opening, you need a Regular size aerator. This is by far the most common size you’ll find in both commercial and residential kitchens.
- Junior Size (The Dime Test): If a nickel is too big but a U.S. dime fits perfectly, you’ll need a Junior size aerator.
- Tom Thumb Size (Smaller than a Dime): If even a dime is too large to fit inside the opening, then you’ve got a Tom Thumb size aerator. This is the smallest and least common of the three.
Just give your maintenance staff a simple checklist and a few coins, and they’ll be able to fly through a portfolio-wide audit with speed and accuracy. That data is the foundation for a perfect purchase order.
Dealing with Non-Standard Faucets
Every now and then, especially with older buildings or designer faucets, your team might run into non-standard threading. Don’t let this throw a wrench in your plans. Specialty adapters are readily available to bridge the gap between an odd-sized faucet and a standard aerator.
The key is to identify these outliers during the audit. Your team should make a note of any faucet that doesn’t match the three standard sizes. When you share this information with a knowledgeable supplier like Conservation Mart, they can help you source the right adapters. This ensures you achieve 100% compatibility across your entire portfolio and avoid any frustrating project delays.
Calculating the Financial Impact of Your Aerator Program
Okay, let’s move past the technical specs and get to the part that really makes the case for an aerator program: the money. This is where a simple plumbing upgrade becomes a smart financial move, and the return on investment isn’t just a vague idea—it’s a hard number you can take to your stakeholders.
The math here is surprisingly straightforward. It just comes down to a few key variables from your own operations. The trick is to remember you’re not just calculating the cost of water, but also the often-overlooked cost of heating that water. For any commercial facility, that’s a huge piece of the puzzle.
The Core Savings Formula
To figure out the real financial impact, you only need a simple but powerful formula. It gives you a solid estimate of annual savings by combining what you’ll save on both your water and energy bills. This is the hard data that justifies the tiny upfront cost of new aerators.
Here’s what you need to plug in:
- Number of Faucets: The total count of kitchen taps you’re planning to retrofit.
- Estimated Daily Use: The average number of minutes each faucet runs per day.
- Local Water/Sewer Rates: Your combined cost per gallon, straight from your utility bill.
- Energy Costs: What you pay to heat water (per therm for gas or kWh for electricity).
With these numbers, you can paint a very clear picture of your potential savings. This isn’t guesswork; it’s a data-driven approach that builds a rock-solid case for getting the project approved.
A Real-World Scenario: A 200-Unit Hotel
To make this crystal clear, let’s walk through an example. We’ll use a 200-unit hotel to show just how fast the savings from a smart aerator program can pile up.
Let’s assume a few things for our hotel:
- Faucets: 200 kitchenettes, each with one tap.
- Original Flow Rate: An older, wasteful rate of 2.2 gallons per minute (GPM).
- New Aerator Flow Rate: A much more efficient 1.5 GPM aerator.
- Daily Usage: Each tap runs for an average of 8 minutes per day.
- Occupancy Rate: A steady 80% year-round.
- Water/Sewer Cost: A combined rate of $0.015 per gallon.
- Water Heater Efficiency: Gas heater at 80% efficiency, with gas costing $1.20 per therm.
By focusing on both water and energy, a facility manager can uncover a hidden stream of revenue. The energy savings from heating less water often match or even exceed the direct water savings, effectively doubling the project’s ROI.
First, let’s figure out the water saved per day. The GPM reduction is 0.7 GPM (2.2 GPM – 1.5 GPM). Over an 8-minute run time, a single faucet saves 5.6 gallons. Multiply that by 200 units at 80% occupancy (160 rooms), and you get 896 gallons saved every single day.
Annually, this hotel saves 327,040 gallons of water. At $0.015 per gallon, that’s a direct cost reduction of $4,905 per year on the water and sewer bill alone. But that’s only half the story.
Factoring in the Overlooked Energy Savings
Now for the energy. Let’s assume 50% of the water used is hot. That means the hotel is saving 163,520 gallons of hot water every year. Think about how much energy it takes to heat that much water—it’s a major expense on your gas or electric bill.
Calculating the exact energy savings involves a few more steps, but the payoff is huge. For our hotel example, the savings from no longer having to heat all that water comes out to roughly $2,100 per year.
Let’s put it all together for the total financial impact:
- Annual Water Savings: $4,905
- Annual Energy Savings: $2,100
- Total Annual Savings: $7,005
If the cost to buy and install 200 high-quality kitchen tap aerators is around $1,000, the payback period for this project is less than two months. After that, the $7,005 in savings goes straight to the bottom line, year after year.
For a more detailed look at how these savings compound, our guide on water-saving aerators as a mindless way to save money offers additional insights. This example highlights how a small, targeted investment can yield impressive and continuous returns for any business.
Getting Installation and Long-Term Maintenance Right
A successful aerator program doesn’t just stop with a delivery of boxes. The real payoff comes from a smooth installation process and reliable, long-term performance. This section is all about giving your maintenance staff the practical, hands-on guidance they need for a seamless rollout and lasting water savings across all your properties.
With a solid plan, your team can get hundreds of kitchen tap aerators installed quickly and correctly. This minimises any disruption for residents and starts delivering a return on your investment from day one.
A Step-by-Step Installation Guide for Your Team
Give your staff a straightforward process to follow. Consistency is the name of the game here—it’s how you prevent common headaches like leaks or damaged taps down the line.
- Get the Old Aerator Off: First, wrap a cloth around the existing aerator to avoid scratching the chrome finish. Use an aerator key or a small adjustable wrench and turn it counter-clockwise to loosen. If you run into a stubborn, corroded aerator, a little penetrating oil can help, but make sure to protect the sink and countertop.
- Clean the Tap Threads: With the old aerator gone, take a look inside the tap spout. You’ll likely see some gunk. Use a small brush (an old toothbrush works great) or a cloth to wipe away any old rubber gaskets, sediment, or limescale. You need a clean surface to get a perfect, leak-free seal.
- Install the New Aerator: Check that the new rubber washer is sitting flat inside the new kitchen tap aerator. Carefully hand-tighten the aerator by turning it clockwise. Go slow to make sure you don’t cross-thread it—it should screw on smoothly.
- Final Tighten and Test: Once it’s hand-tight, give it one last quarter-turn with the wrench to snug it up. But be careful not to overtighten! Overtightening can crush the washer or strip the threads. Finally, turn on the water and look closely for any drips around the new connection.
Setting Up a Simple Maintenance Schedule
Your long-term savings really hinge on keeping these aerators working as they should. Over time, especially in hard water areas, mineral and sediment buildup can clog the screen, slow the flow, and undo all the good work. A simple, proactive maintenance plan is the answer.
Think of preventative maintenance not as a cost, but as an insurance policy for your savings. A quick annual cleaning takes just a few minutes but guarantees your aerators deliver peak performance for years, protecting your initial investment.
We always recommend a simple annual check-up for every retrofitted tap. The process couldn’t be easier:
- Annual Check: Once a year, just unscrew the aerator.
- Soak and Scrub: Take the aerator apart and let the pieces soak in a bowl of white vinegar or a mild descaling solution. This dissolves any limescale. An old toothbrush can be used to gently scrub away any leftover debris.
- Rinse and Reinstall: Rinse all the parts with clean water, put the aerator back together, and screw it back onto the tap.
This little bit of effort prevents performance from slowly degrading, which keeps tenant complaints down and your savings up.
Of course, long-term maintenance also means tackling other plumbing issues as they pop up. A dripping tap, for instance, can waste a shocking amount of water. This excellent guide to fixing a dripping tap has some great, practical steps for stopping waste at the source. Making sure the entire fixture is in good working order is key to maximising efficiency.
Troubleshooting Common Issues
Even with a perfect installation, issues can sometimes arise. Here’s a quick-reference table your maintenance staff can use to diagnose and solve the most common problems they might encounter.
| Symptom | Potential Cause | Recommended Solution |
|---|---|---|
| Weak or sputtering flow | Debris or mineral buildup is clogging the screen. | Remove, disassemble, and clean the aerator by soaking in vinegar and scrubbing gently. |
| Leaking around the threads | The washer is missing, damaged, or not seated correctly. | Unscrew the aerator, check the washer’s condition and placement, and replace if necessary. |
| Water spraying sideways | The aerator screen is damaged or clogged unevenly. | Clean the aerator thoroughly. If the problem persists, the screen may be damaged and the unit needs replacing. |
| Aerator won’t unscrew | Mineral buildup has “cemented” the threads in place. | Wrap the aerator with a cloth soaked in hot vinegar for 10-15 minutes, then try again with a wrench. |
| No change in water flow | The wrong flow rate aerator was installed, or the building has very low water pressure. | Verify the aerator’s GPM matches the order. Test water pressure; a booster may be needed in some cases. |
Keeping this checklist handy can turn a tenant complaint into a quick, five-minute fix, ensuring your water conservation program runs smoothly for years to come.
Developing Smart Procurement Standards
If you’re a purchasing manager or program leader, you know that a big order of kitchen tap aerators involves a lot more than just the price per unit. To make sure your program is a long-term success and you get the most out of your investment, you need to set up some solid procurement standards. A smart strategy looks past the initial purchase and zeroes in on certified performance, durability, and operational security.
This kind of thinking ensures the aerators you buy will actually deliver the savings you’re counting on and hold up in a demanding commercial environment for years to come.
Prioritizing Certified Performance and Durability
The first rule of smart procurement? Look for third-party validation. Certifications aren’t just logos on a box; they’re your proof that a product has been independently tested to meet strict efficiency and performance standards.
- WaterSense Certification: Always look for aerators with the EPA WaterSense label. This is your guarantee that the product saves a significant amount of water without killing the water pressure—a claim verified by impartial, third-party testing.
- Material Quality: Take a close look at what the aerators are made of. Plastic models might be cheaper upfront, but chrome-plated brass offers far better longevity, especially in high-traffic spots like apartment complexes or office breakrooms. Brass resists corrosion and cracking much better than plastic, which means fewer replacements and lower labor costs down the road.
Spending a little more on a certified, brass-bodied aerator almost always results in a lower total cost of ownership. It saves you from the recurring expenses and operational headaches that come with cheap products failing early and needing constant replacement.
Enhancing Security and Streamlining Rollouts
In many commercial or public settings, standard aerators can be easily unscrewed and removed, leading to lost inventory and wiping out your water savings. For public restrooms, multi-family housing, or any unsupervised area, specifying tamper-proof kitchen tap aerators is a critical move. These models require a special key to install and remove, making sure they stay put and keep delivering savings. It’s worth exploring tamper-proof options from suppliers like Conservation Mart to protect your investment.
Finally, think strategically about how you’ll buy and deploy these aerators. For large-scale projects, talk to your suppliers about bulk purchasing options to get a better cost per unit. Consider a phased rollout—tackling the project building by building or floor by floor—to minimize disruption for tenants or employees. This methodical approach makes the project more manageable for your maintenance crew and lets you track the financial impact more effectively as each phase wraps up, positioning you for an investment that pays dividends for years.
Common Questions from Facility Managers
When you’re planning a large-scale retrofit, a few practical questions always come up. Facility and program managers want to know about performance, longevity, and overall strategy before committing. Getting these answers sorted out upfront makes for a much smoother project and helps build a rock-solid business case for investing in kitchen tap aerators.
A big one we hear all the time is about water pressure. Will low-flow models lead to a flood of complaints? The short answer is, not if you choose the right ones. Modern aerators are cleverly engineered to mix air into the stream. This creates a surprisingly robust, full-feeling flow while slashing water use. For most commercial applications, like handwashing in a breakroom, the perceived pressure is fantastic.
Longevity and Customization
Another frequent question is about how often you’ll need to replace commercial aerators. The good news is that high-quality, commercial-grade aerators made from chrome-plated brass are built to last for years. The main enemy they face is mineral buildup from hard water, which is why we always recommend a simple annual inspection and cleaning as part of your standard maintenance. You’ll really only need to replace them if they get damaged or hopelessly clogged.
A smart move is to tailor the flow rate to the specific application. This approach squeezes the most savings out of your portfolio without ever getting in the way of how the faucet needs to function.
Here’s how that looks in the real world: You could spec out 0.5 GPM aerators for public restrooms where handwashing is the only task. Then, step it up to 1.0 GPM for employee breakroom kitchens. You’d only keep higher-flow devices for spots where filling things up quickly is an absolute must.
When you’re setting up procurement standards for kitchen tap aerators, it’s a good idea to also think about identifying trusted faucet suppliers. This ensures that every piece of the puzzle, from the faucet itself down to the aerator, meets your standards for durability and performance, protecting your investment for the long haul.
At Conservation Mart, we specialize in getting businesses the high-quality, durable kitchen tap aerators they need to cut utility costs and run a more efficient operation. Our huge selection of commercial-grade products means you can find the perfect fit and flow rate for every single tap across your properties.
Browse our full range of water-saving kitchen tap aerators on ConservationMart.com and start building your cost-saving program today.