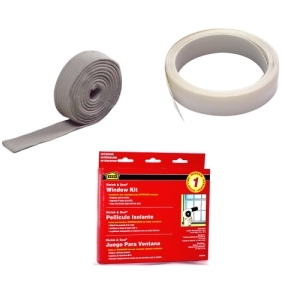
It might be days before Halloween, but already there’s a chill in the air. Prevent that chill from becoming an unwelcome guest in your home by sealing up your windows. Follow these simple steps to install weatherization supplies like rope caulk, V-seal weatherstrip, and Shrink and Seal window kits and you’ll provide an instant sealing benefit to the windows in your home.
Installing Rope Caulk
- Clean: For the rope caulk to achieve its maximum level of stickiness, clean up the surface of the area where you’ll install it. Dirt, grease, moisture, and even old pieces of caulk should be cleared up if you want the rope caulk to seal effectively.
- Peel: Carefully peel off the top layer of rope caulk “beads.” Separate each bead, or individual cord of rope caulk, according to the width you need.
- Press to Seal: Firmly press the caulk into any cracks, gaps, and openings to seal them up.
Bonus use of rope caulk: Aside from being easy to install, rope caulk is easy to clean up, leaves no mess, and it stays durable in any weather condition.
Installing a V-Seal Weatherstrip
- Clean: As with many weatherization supplies, you need to clean the area where you’ll install the V-seal weatherstrip. Measure, Then Cut: Measure the length of the window you’re sealing. Then, cut the amount of V-seal needed.
- Shape: The V-seal weatherstrip has a seam running down the middle to help you easily create the “V” shape for installation. Just fold the strip vertically right down the marked line.
- Peel and Seal: Peel off the the V-seal’s adhesive backing. Press the V-seal into the corner of the window to seal.
Installing a Shrink and Seal Window Kit
Seal your entire window with a Shrink and Seal window kit.
- Clean: I really can’t stress enough about the importance of this. Clean the area where you plan to install the Shrink and Seal window kit. It’s also useful to wash the insides of the window since you won’t be able to wash them again until you remove the shrink-film.
- Cut Shrink Film: Hold up the shrink-film over the entire window to see how much film you’ll need to seal it off (part of window frame included). Cut the amount desired.
- Install two-sided tape: Remove one side of the tape and place it on window sides, top, and bottom. Then, once you’ve installed the tape, remove the the backing from the other side.
- Installing shrink-film: It’s easier to work with the shrink film if you start from one corner then work your way around. Gently stretch the film as you apply it to each corner of the tape.
- Tighten the film: Put your blow dryer on the highest setting. Standing a few inches away from the window, move your dryer back and forth, up and down, and diagonally across the shrink-film to make it tighter. Don’t keep the dryer on one area for too long because the plastic will melt if too much heat is applied to it.
- Cut: If needed, cut away any excess shrink-film.
Each one of these weatherization supplies comes with a different set of instructions, but all will help to properly insulate your home, decrease your energy usage, and save you hundreds (and then some) off your energy bill.
