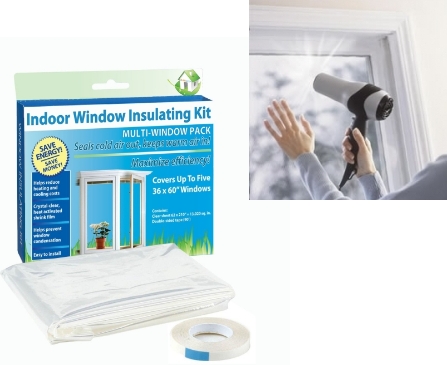
As the year draws to a close, people are planning various parties, decorating their homes, and coming up with resolutions they’re sure to break within the first few months of the new year. It also happens to be during this time of the year that many see a dramatic increase in the amount of money paid for energy, specifically for heating. This is due largely to poor insulation, which allows the air from outside to make its way into the home. One of the simplest and most cost-effective ways to reduce this problem is by installing plastic windows.
Keeping Cold Air Out
Windows make up anywhere from 10 percent to 25 percent of home heat and energy loss. You may be wondering how an item that sounds as simple as a plastic window could possibly eliminate this loss, or even lower the amount. The plastic film is also an insulating film. When correctly installed over the face of the window, it blocks cold air from entering the home through windows, which will also stop the warmer air from leaving.
Types of Plastic Windows
Plastic windows, also referred to as interior storm windows, come in two different styles: those with channeling, and those without.
Channeling: This type of interior storm window comes with plastic channeling, clear film, and adhesive. The channeling coupled with the plastic gives the appearance of placing a new window frame over the existing one.
Without Channeling: Storm windows without channeling include only the insulating plastic and a roll of tape. Although it has less components than the windows with channeling, it has more steps for installation.
Both types are also cost-effective. Storm windows without the channeling cost approximately $3 to $6, while storm windows with channeling are valued at $9 to $15. They are available for a variety of window sizes, so be sure to take measurements before making a purchase.
Installing Storm Windows
Installation of the window kit with channeling can be completed in a few simple steps:
- Attach plastic channels around the frame of the window.
- Over the face of the window, spread the plastic insulation film.
- Using the thin plastic strip (the spline), hold the plastic in place, and lock it into the channel.
- Trim the channels and spline if necessary using a utility knife. The plastic film can be trimmed with scissors.
Installing plastic windows without channeling can be completed by doing the following:
- Clean around the window surface’s edge, and allow it to dry.
- After a 10-minute wait, place the tape around the edges
- Cut the plastic film in a way that allows there to be a 2-inch overlap on either side of the window.
- At the top of the window, press the plastic against the tape lightly, and gently stretch and press the film at the bottom. Carefully repeat this along the sides.
- Once set, press the plastic film firmly against the tape.
- Using the highest setting on a hair dryer, pass it over the film. Make sure the dryer is being used at a 1″ distance, and never comes in contact with the plastic.
- The film should shrink until all wrinkles appear.
- Trim away any excess film with scissors.
Once the window insulation has been installed, you won’t have to worry about cold air coming in through your windows while heated air leaks out. Also, with 10-25 percent of heat loss eliminated from energy costs, the fear of higher energy bills this winter will also be pushed to the back of your mind.

Ice cold winds are still coming through plastic on windows. Any ideas why?
Hi Nanette. Thank you for your question. Were the windows and frame cleaned before installation?